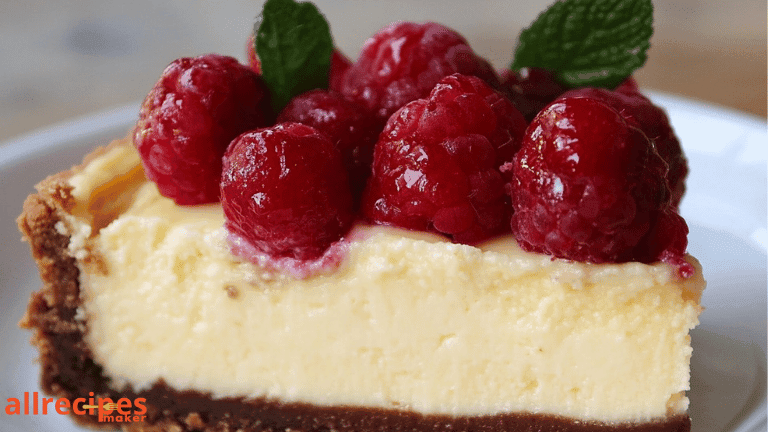
How to Make the Perfect Homemade Cheesecake: Step-by-Step Guide
Cheesecake—it’s creamy, indulgent, and the ultimate crowd-pleaser. But let’s be honest, baking a cheesecake at home can feel intimidating. The cracking, the sinking, the runny middles… we’ve all been there. The good news? With a little know-how, you can create the perfect homemade cheesecake that’s silky smooth, beautifully baked, and absolutely delicious.
This step-by-step guide will walk you through the entire process—from crafting the buttery crust to nailing the creamy filling to achieving that flawless finish. Whether you’re a cheesecake rookie or a seasoned baker, this recipe has got you covered.
Table of Contents
Table of Contents
Ingredients for Cheesecake Perfection
Before you start, gather the essentials. Here’s what you’ll need:
For the Crust:
- 1 ½ cups of graham cracker crumbs (or digestive biscuits, crushed)
- 5 tablespoons unsalted butter, melted
- 2 tablespoons granulated sugar
For the Filling:
- 4 (8-ounce) packages of cream cheese, softened
- 1 cup granulated sugar
- 1 cup sour cream (for that tangy touch)
- 1 teaspoon vanilla extract
- 4 large eggs, at room temperature
- 2 tablespoons all-purpose flour (to prevent cracking)
Optional Toppings:
- Fresh berries (strawberries, blueberries, raspberries)
- Chocolate ganache
- Whipped cream
- Caramel drizzle
Step 1: Prepare the Crust
The crust is the foundation of any cheesecake, so let’s make it count!
- Crush the Crackers: Blitz the graham crackers or biscuits in a food processor until they’re fine crumbs.
- Mix It Up: Combine the crumbs, melted butter, and sugar in a bowl. Mix until it resembles wet sand.
- Press Into the Pan: Line a 9-inch springform pan with parchment paper. Press the crumb mixture into the bottom of the pan, ensuring it’s even and firmly packed. Use the back of a spoon or a flat-bottomed glass for a smooth finish.
- Chill the Crust: Pop the pan into the fridge while you prepare the filling. This helps the crust set.
Step 2: Make the Creamy Filling
The filling is the star of the show. Follow these tips for a perfectly smooth and creamy texture:
- To soften the cream cheese and prevent lumps, make sure it is at room temperature. Beat it on medium speed using a hand mixer or stand mixer until it’s creamy and smooth.
- Add the Sugar and Flour: Gradually add the sugar and flour while mixing. The flour helps stabilize the cheesecake and prevents cracks.
- Incorporate the Sour Cream and Vanilla: Mix in the sour cream and vanilla extract until well combined.
- Add the Eggs (One at a Time): Add the eggs one by one, mixing on low speed. Overmixing at this stage can lead to cracks, so keep it gentle!
Step 3: Assemble and Bake
Here’s where the magic happens:
- Pour the Filling Over the Crust: Take the chilled crust out of the fridge and pour the filling over it. Smooth the top with a spatula.
- Use a Water Bath: Wrap the bottom of the springform pan in aluminum foil to prevent leaks. Place the pan in a large roasting tray and fill the tray with hot water about halfway up the sides of the pan. This prevents cracking by creating steam in the oven.
- Bake: Preheat your oven to 325°F (160°C) and bake for 50–60 minutes. The cheesecake is ready when the edges are set, but the center still jiggles slightly when shaken.
Step 4: Cool and Chill
Patience is key when it comes to cheesecake.
- Cool in the Oven: Turn off the oven and gently open the door to allow the oven to cool. This gradual cooling process prevents sudden temperature changes, which can cause cracks.
- Chill in the Fridge: Once cooled to room temperature, refrigerate the cheesecake for at least 4–6 hours (or overnight for best results).
Step 5: Add the Finishing Touches
A plain cheesecake is a blank canvas—time to get creative with toppings!
- Berry Toppings: Arrange fresh berries on top for a vibrant and fruity finish.
- Chocolate Ganache: Pour a glossy layer of melted chocolate over the cheesecake.
- Whipped Cream: Pipe swirls of whipped cream around the edges for a classic touch.
- Caramel Drizzle: Drizzle salted caramel sauce for a decadent treat.
Troubleshooting Tips for Cheesecake Success
Cheesecakes can be tricky, but these tips will help you nail it every time:
- Avoid Overmixing: Overmixing incorporates too much air, which can cause the cheesecake to rise and fall, leading to cracks.
- Don’t Skip the Water Bath: It might seem like an extra step, but the water bath is crucial for even baking and preventing cracks.
- Test for Doneness: Remember, the center should jiggle slightly when shaken—it will firm up as it cools.
- Prevent Overbaking: Overbaking can dry out your cheesecake. Keep an eye on the timer!
FAQs
Q: Does cheesecake need a springform pan to make?
A: Yes, but a springform pan makes it easier to remove the cheesecake. If you don’t have one, use a regular cake pan lined with parchment paper for easy removal.
Q: How do I store leftover cheesecake?
A: Store it in an airtight container in the fridge for up to 5 days or freeze individual slices for up to 2 months.
Q: Why did my cheesecake crack?
A: Cracks are usually caused by overbaking, rapid cooling, or skipping the water bath. Follow the tips above to avoid this!
Final Bite
Making the perfect homemade cheesecake doesn’t have to be daunting. With a buttery crust, velvety filling, and creative toppings, you’ll have a show-stopping dessert that’s sure to impress. Whether it’s a birthday, holiday, or just because—you’ll never need to buy cheesecake again once you master this recipe!
Ready to bake? Preheat that oven, grab your mixing bowl, and get started. Trust me, there’s nothing more satisfying than slicing into your very own homemade cheesecake.

