
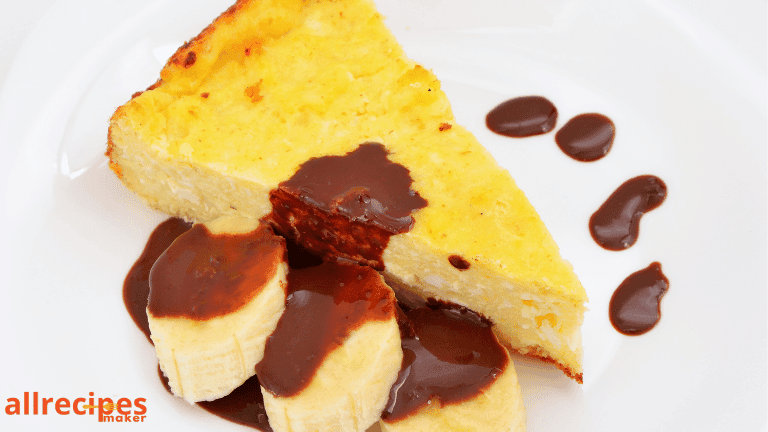
How to Make the Best Banana Pudding Cheesecake at Home
Dreaming of a dessert that’s creamy, indulgent, and a total crowd-pleaser? This banana pudding cheesecake brings together the best of two worlds: the rich decadence of cheesecake and the nostalgic flavors of banana pudding. Whether you’re hosting a party or treating yourself, this recipe will hit the sweet spot every time.
Let’s dive right into this step-by-step guide to creating the ultimate banana pudding cheesecake.
Table of Contents
Table of Contents
Ingredients You’ll Need
Here’s everything to get started. Make sure to grab these from your pantry or your local grocery store:
For the Crust:
- 2 cups crushed vanilla wafer cookies (about 50 wafers)
- 1/4 cup granulated sugar
- 1/2 cup unsalted butter, melted
For the Cheesecake Filling:
- 24 oz (3 blocks) cream cheese, softened
- 1 cup granulated sugar
- 3 large eggs
- 1/2 cup sour cream
- 1 teaspoon vanilla extract
- 2 ripe bananas, mashed
For the Banana Pudding Layer:
- 1 package (3.4 oz) instant banana pudding mix
- 2 cups cold milk
- 1 cup heavy whipping cream (whipped to stiff peaks)
For the Topping:
- Sliced bananas (for garnish)
- Vanilla wafer cookies (whole or crushed)
- Whipped cream (optional)
Step-by-Step Instructions
1. Prep the Crust
- Crush the Cookies: Toss your vanilla wafers into a food processor and blend until you get fine crumbs.
- Mix and Press: Combine the crumbs with sugar and melted butter, then press the mixture firmly into the bottom of a 9-inch springform pan. Use the back of a spoon or a flat glass for an even layer.
- Bake: Preheat your oven to 325°F (165°C) and bake the crust for 10 minutes. Let it cool completely.
2. Make the Cheesecake Filling
- Cream the Ingredients: Beat the cream cheese and sugar in a large bowl until smooth and fluffy. One by one, add the eggs, thoroughly mixing each time.
- Add the Bananas: Stir in the mashed bananas, sour cream, and vanilla extract. Mix until just combined (don’t overmix!).
- Bake the Cheesecake: Pour the filling onto the cooled crust. Bake at 325°F for 60–70 minutes, or until the center is slightly jiggly but set.
- Cool Completely: Let the cheesecake cool at room temperature, then refrigerate for at least 4–6 hours or overnight for best results.
3. Prepare the Banana Pudding Layer
- Mix the Pudding: In a bowl, whisk the instant banana pudding mix with cold milk until it thickens (about 2 minutes).
- Fold in Whipped Cream: Gently fold the whipped cream into the pudding to make it light and fluffy.
4. Assemble the Layers
- Spread the Pudding Layer: Once the cheesecake is completely chilled, spread the banana pudding mixture evenly on top.
- Add Toppings: Garnish with sliced bananas, whole or crushed vanilla wafers, and a dollop of whipped cream if desired.
5. Chill and Serve
Refrigerate the assembled cheesecake for at least 2 hours to allow all the flavors to meld together. When you’re ready to serve, slice it up and watch the compliments roll in!
Tips for the Perfect Banana Pudding Cheesecake
- Ripe Bananas Are Key: Make sure your bananas are ripe enough for maximum flavor and sweetness. Brown spots on the peel are a good sign!
- Prevent Browning: If you’re worried about the banana slices turning brown, toss them in a little lemon juice before using them as a garnish.
- Springform Pan Magic: Line the bottom of your pan with parchment paper to make it easier to transfer the cheesecake.
- No Cracks: Place a pan of water on the bottom rack of your oven while baking to prevent cracks in your cheesecake.
FAQs
Can I make this cheesecake without baking it?
Absolutely! For a no-bake version, skip the baked cheesecake layer and use a pre-made crust. Combine cream cheese, mashed bananas, and whipped cream for the filling. Layer with banana pudding and toppings, then chill to set.
How long can I store banana pudding cheesecake?
Keep it in the refrigerator for up to 4 days. you keep it fresh, make sure you keep it in an airtight container.
Can I make this recipe gluten-free?
Yes! Substitute the vanilla wafers with a gluten-free cookie alternative, and double-check that your pudding mix is gluten-free too.
Why You’ll Love This Recipe
- Flavor Explosion: The sweet bananas, creamy pudding, and tangy cheesecake come together perfectly.
- Texture Heaven: From the crunchy crust to the silky filling, every bite is an experience.
- Showstopper Dessert: It looks as good as it tastes, making it perfect for holidays or celebrations.
So, are you ready to impress your friends and family with this banana pudding cheesecake? Trust me, this dessert is worth every second in the kitchen. Give it a try, and don’t forget to save yourself a slice before it’s all gone! 😉