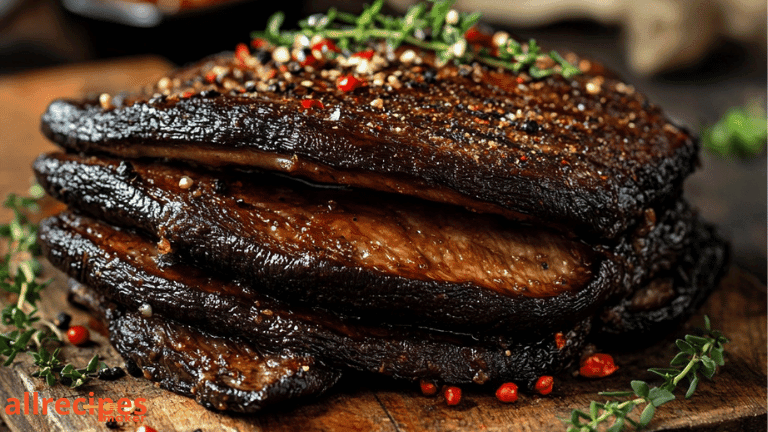
Brisket Done Right: Expert Tips for Juicy Results
Brisket isn’t just a cut of meat—it’s a labor of love, a BBQ centerpiece that can make or break any backyard gathering. Whether you’re a beginner or a pitmaster looking to up your game, getting brisket “done right” takes patience, practice, and the right know-how. But fear not—this guide will take you through every juicy detail, from picking the perfect cut to serving your masterpiece with pride.
Table of Contents
Table of Contents
1. Choosing the Right Brisket
First things first: not all briskets are created equal. If you start with a low-quality cut, no amount of seasoning or smoking can save it.
Key Tips for Selecting the Perfect Brisket:
- Grade Matters: Look for USDA Prime or Choice briskets. Prime has more marbling, which means more fat—and fat equals flavor.
- Weight: A whole brisket (often called a “packer brisket”) typically weighs between 10-16 pounds. For juicier results, aim for one with a thick, evenly distributed flat section.
- Flexibility: Pick up the brisket and see how it bends. A more flexible brisket usually indicates good fat distribution.
Want to dive deeper? Check out this guide to beef grades for more info.
2. The Perfect Prep: Trim It Up
Prepping your brisket is where the magic starts. Before you even think about seasoning or cooking, a little trimming is in order.
What to Trim:
- Excess Fat: Leave about ¼-inch of the fat cap (the thick fat layer) intact. Too much fat, and your brisket will be greasy; too little, and it’ll dry out.
- Silver Skin: Trim off the tough, silver membrane on the underside—it doesn’t render during cooking and can make slices chewy.
3. Season Like a Pro
When it comes to seasoning brisket, less is often more. A simple rub can bring out the beef’s natural flavors without overwhelming it.
Classic Brisket Rub Recipe:
- 2 tablespoons kosher salt
- 2 tablespoons coarse black pepper
- 1 tablespoon garlic powder
- 1 teaspoon paprika (optional, for a hint of color and sweetness)
Generously coat the brisket with the rub. Don’t forget the sides and edges—every bite deserves flavor! Pro tip: Season your brisket at least 1 hour before cooking, or better yet, let it sit overnight in the fridge for maximum flavor penetration.
4. Mastering the Smoking Process
Ah, the heart and soul of brisket: the smoke. This step takes time, but trust me—it’s worth every minute.
Set Your Smoker Right:
- Wood Choice: Go for hardwoods like oak, hickory, or mesquite. For a milder flavor, try fruitwoods like apple or cherry.
- Temperature: Keep your smoker steady at 225°F-250°F for low and slow cooking.
- Placement: Place the briske.t fat side up to let the juices baste the meat as it cooks.
The 3 Key Phases of Smoking:
- The Smoke Ring (0-4 hours): During the first few hours, your briske.t absorbs the most smoke, which creates that coveted pink ring.
- The Stall (4-6 hours): At around 150°F internal temperature, your briske.t will “stall,” meaning the temp won’t rise for a while. Don’t panic—it’s just the meat sweating. To push through, you can wrap it in butcher paper (Texas Crutch) to lock in moisture.
- Finishing Strong (6-10 hours): Cook until the internal temperature reaches 200°F-205°F. Use a meat thermometer to check for doneness—it should feel like a knife sliding through warm butter.
5. Rest, Then Slice
After hours of cooking, it’s tempting to dig right in—but hold up! Resting your briske.t is crucial for locking in those juices.
How to Rest Brisket:
- Wrap the cooked briske.t in foil or butcher paper, then place it in a cooler (without ice) for 1-2 hours. This allows the juices to redistribute, making every bite tender and moist.
Slicing Tips:
- Always slice against the grain for maximum tenderness.
- Use a sharp carving knife, and aim for ¼-inch thick slices.
6. Common Brisket Mistakes to Avoid
Even seasoned pros can hit a snag now and then. Here are some pitfalls to steer clear of:
- Rushing the Process: Low and slow is the name of the game. Don’t try to speed things up by cranking the heat.
- Skipping the Wrap: Wrapping during the stall phase can be a game-changer for retaining moisture.
- Over-Trimming: Don’t get carried away cutting off fat—some fat is necessary for flavor and juiciness.
FAQs About Cooking Brisket
Q: How long will it take to smoke a brisket?
A: As a general rule of thumb, plan for 1-1.5 hours of cook time per pound at 225°F. For a 12-pound briske.t, that’s roughly 12-18 hours.
Q: Can I cook brisket in the oven instead of a smoker?
A: Absolutely! While you won’t get the smoky flavor, cooking in the oven at 225°F can still produce tender, juicy results. Just use liquid smoke in your seasoning rub for a hint of BBQ flavor.
Q: How do I store leftover brisket?
A: Wrap it tightly in foil or place it in an airtight container, then refrigerate for up to 4 days. To reheat, steam it or heat in the oven at 250°F to prevent drying out.
Wrapping It Up
Perfecting brisket takes time, but once you nail the process, the results are nothing short of magical. By starting with a quality cut, mastering the art of seasoning and smoking, and avoiding common mistakes, you’ll create a briske.t that’ll have everyone coming back for seconds—and thirds!
Ready to fire up your smoker? With these tips in your arsenal, you’re set to become the briske.t master of your crew. Don’t be afraid to experiment and put your own spin on things—BBQ is as much about creativity as it is about technique.
There are no reviews yet. Be the first one to write one.

