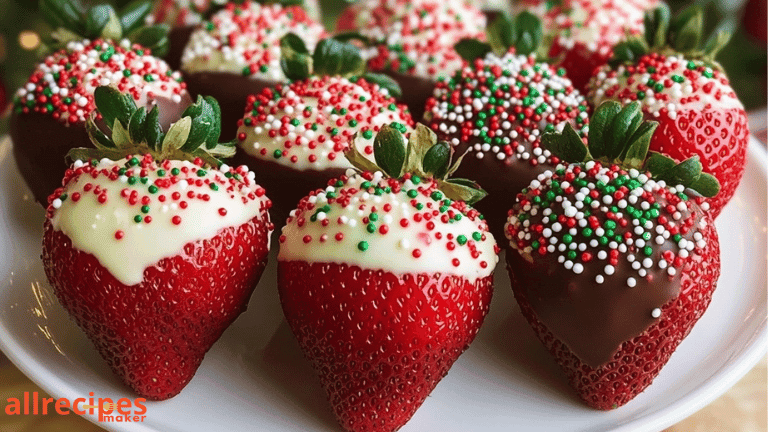
How to Make Perfect Chocolate-Covered Strawberries at Home
Introduction
Few desserts are as elegant, romantic, or downright delicious as chocolate-covered strawberries. Whether you’re making them for Valentine’s Day, a special event, or just a sweet snack, these decadent treats are always a hit.
But, let’s be honest—making perfect chocolate-covered strawberries can be tricky. Think streaky chocolate, clumpy coatings, or berries that don’t hold their shine. Don’t worry, though! This guide will teach you how to make chocolate-covered strawberries at home that look and taste just like the ones from a fancy dessert shop.
Table of Contents
Table of Contents
Why Make Chocolate-Covered Strawberries at Home?
Sure, you can buy them pre-made, but here’s why homemade is better:
- Customizable: Choose your favorite chocolate and toppings.
- Freshness: Nothing beats strawberries dipped fresh on the same day!
- Cost-Effective: Store-bought versions can be pricey, but making them at home is much cheaper.
- Fun to Make: It’s an enjoyable activity for couples, friends, or families.
Ingredients You’ll Need
The best part about chocolate-covered strawberries? You only need a handful of ingredients!
- Fresh Strawberries: Choose large, ripe strawberries with their green tops intact. These make dipping easier and look more appealing.
- Chocolate: Use high-quality chocolate for the best flavor. Options include:
- Semi-sweet chocolate
- Dark chocolate
- Milk chocolate
- White chocolate (optional, for drizzle or decoration)
- Optional Toppings: Sprinkles, chopped nuts, shredded coconut, or crushed cookies for extra flair.
- Coconut Oil (Optional): A teaspoon or two can be added to the chocolate for a smooth, shiny finish.
Tools You’ll Need
Gather these basic tools before you start:
- A microwave-safe bowl or double boiler
- A parchment-lined baking sheet
- A fork or toothpick (for decoration, if needed)
- A spoon for drizzling (if you’re adding decorative touches)
Step-by-Step Instructions
Follow these steps to create flawless chocolate-covered strawberries every time:
Step 1: Prep the Strawberries
- Wash and Dry Thoroughly: Rinse your strawberries gently under cold water and pat them dry with paper towels. Let them air dry completely, as any moisture will prevent the chocolate from sticking.
- Leave the Tops On: The green tops not only look pretty but also act as handles for dipping.
Step 2: Melt the Chocolate
- Using a Microwave: Place your chocolate in a microwave-safe bowl. Heat in 20–30 second intervals, stirring after each session until smooth and fully melted.
- Using a Double Boiler: Place your chocolate in a heatproof bowl set over a pot of simmering water. Stir until melted and glossy.
Pro Tip: Add a teaspoon of coconut oil to the chocolate for extra shine and a smoother texture.
Step 3: Dip the Strawberries
- Dip each strawberry into the molten chocolate, holding the green top in place. Swirl it gently to ensure an even coating.
- Let any excess chocolate drip off before placing the strawberry on a parchment-lined baking sheet.
- Repeat until all your strawberries are dipped.
Step 4: Add Toppings (Optional)
- While the chocolate is still wet, sprinkle your desired toppings—nuts, sprinkles, or crushed cookies—onto the strawberries. Get creative!
- For a more elegant look, drizzle melted white chocolate over the top using a fork or piping bag.
Step 5: Let Them Set
- Place the tray in the refrigerator for about 15–30 minutes to allow the chocolate to harden. Once set, the strawberries are ready to enjoy!
Tips for Success
- Use Room-Temperature Strawberries: Cold strawberries can cause the chocolate to seize or form condensation, ruining the coating.
- Work Quickly: Melted chocolate can firm up fast, so don’t take too long when dipping and decorating.
- Use Good Chocolate: High-quality chocolate (like baking chocolate or couverture chocolate) melts better and tastes amazing. Avoid chocolate chips, as they often contain stabilizers that prevent smooth melting.
- Don’t Overload with Toppings: A little goes a long way—too many toppings can overwhelm the chocolate.
How to Store Chocolate-Covered Strawberries
- Short-Term Storage: Store them in an airtight container in a single layer for up to 24 hours.
- Refrigerate Carefully: If you must refrigerate them, line the container with a paper towel to absorb moisture and prevent sweating.
Note: Chocolate-covered strawberries are best enjoyed the same day they’re made for the freshest flavor and texture.
Creative Variations
Feeling adventurous? Here are some fun ways to elevate your chocolate-covered strawberries:
- Marbled Look: Dip the strawberries in dark chocolate and then immediately swirl white chocolate over the top for a marbled effect.
- Holiday Theme: Use red, green, or gold sprinkles for Christmas, or pink and red hearts for Valentine’s Day.
- Dipped Tips: For a unique twist, dip only the bottom half of the strawberries in chocolate, leaving the top exposed.
- Flavor Infusion: Add a drop of mint or orange extract to the melted chocolate for a flavored twist.
FAQs
Q: Why is my chocolate not sticking to the strawberries?
A: This often happens if the strawberries aren’t completely dry. Be sure to pat them dry and let them air dry before dipping.
Q: Can I make these ahead of time?
A: Yes, but they’re best eaten the same day. If needed, store them in the fridge for up to 24 hours.
Q: What chocolate works best?
A: High-quality baking chocolate or couverture chocolate works best for smooth melting and a glossy finish.
Q: Can I use frozen strawberries?
A: Fresh strawberries are ideal, as frozen ones release moisture when thawed, making it difficult for the chocolate to adhere.
Wrapping It Up
And there you have it—a complete guide to making perfect chocolate-covered strawberries at home! They’re elegant, easy, and incredibly versatile, making them a go-to treat for holidays, parties, or even a simple indulgence.
So, grab some fresh strawberries, melt that chocolate, and get dipping! Whether you keep them simple or go wild with toppings, you’ll have a batch of irresistible goodies in no time.

