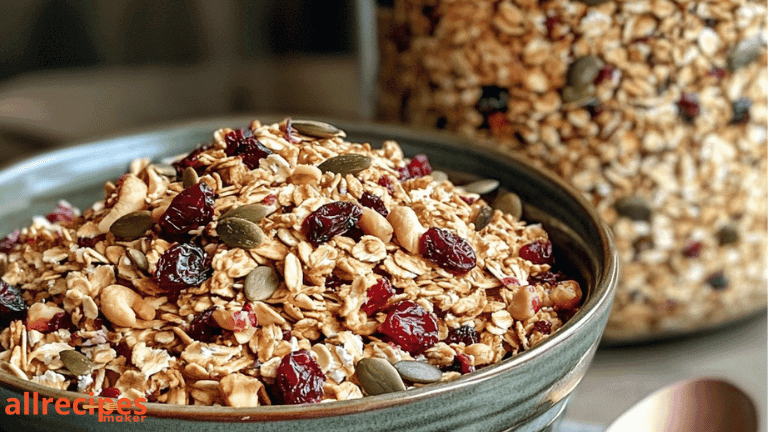
How to Make Homemade Granola in Easy Steps
Tired of store-bought granola that’s either too sugary or ridiculously expensive? It’s time to take control—literally! Homemade granola is not only delicious and easy to make, but it’s also super customizable. Whether you like it nutty, fruity, or extra crunchy, this guide has got you covered. Let’s dive into the easy steps for making homemade granola that’ll leave your kitchen smelling heavenly.
Table of Contents
Table of Contents
Why Make Homemade Granola?
Before we jump into the recipe, let’s talk about why homemade granola is a game-changer:
- Healthier: You control the ingredients—no sneaky preservatives or added sugars.
- Cost-Effective: Homemade granola costs way less than store-bought brands.
- Customizable: Add your favorite nuts, seeds, or sweeteners to match your taste.
- Eco-Friendly: Reduce packaging waste by making your own.
Now that you’re sold on the benefits, let’s gather our ingredients and get started.
Ingredients You’ll Need
Here’s a basic list of ingredients to create a classic granola:
- Dry Ingredients:
- 3 cups old-fashioned rolled oats (not instant!)
- 1 cup nuts (almonds, walnuts, or pecans work great)
- ½!– /wp:list-item –>
- ½ teaspoon salt
- ½ teaspoon cinnamon (optional but adds warmth)
- ⅓ cup honey or maple syrup (for sweetness)
- ⅓ cup coconut oil or olive oil
- 1 teaspoon vanilla extract
- 1 cup dried fruit (raisins, cranberries, or chopped apricots)
- ½ cup chocolate chips (add after baking!)
Feel free to substitute or add your preferred ingredients. Love coconut flakes or hemp seeds? Toss ’em in!
Step-by-Step Guide
Step 1: Preheat Your Oven
Preheat the oven to 325°F (165°C), and line a large baking sheet with parchment paper. This prevents sticking and makes cleanup a breeze.
Step 2: Mix the Dry Ingredients
In a large mixing bowl, combine the rolled oats, nuts, seeds, salt, and cinnamon. Stir everything together to evenly distribute the flavors.
Step 3: Combine the Wet Ingredients
In a small saucepan over low heat, warm the honey (or maple syrup), coconut oil, and vanilla extract until melted and smooth. Stir well.
Step 4: Pour and Mix
Pour the wet mixture over the dry ingredients. Using a spatula, stir until every oat and nut is lightly coated. This ensures your granola bakes evenly and gets that golden crunch.
Step 5: Spread and Bake
Spread the granola mixture evenly onto the baking sheet you’ve prepared. Make sure it’s in a thin, even layer—this helps it bake uniformly. Pop it in the oven for 20-25 minutes, stirring halfway through to prevent burning.
Pro Tip: If you like chunky granola clusters, press the mixture down firmly with the back of a spatula before baking and avoid stirring too much!
Step 6: Let It Cool
When the granola is golden brown, take it from the oven and allow it to cool fully on the baking sheet. It will crisp up as it cools—resist the urge to dig in too soon!
Step 7: Add Your Extras
Once cool, mix in your dried fruit, coconut flakes, or chocolate chips. Store the finished granola in an airtight container at room temperature for up to 2 weeks.
Tips for Customizing Your Granola
The beauty of homemade granola is that you can tweak it to your heart’s content. Here are some ideas:
- Make It Sweeter: Add a touch more honey or maple syrup if you have a sweet tooth.
- Go Nut-Free: Sub in extra seeds like sunflower or pumpkin if you have nut allergies.
- Add a Crunch: Sprinkle in toasted quinoa or rice cereal.
- Spice It Up: Experiment with spices like nutmeg, cardamom, or ginger for a unique flavor.
- Boost Protein: Add a scoop of your favorite protein powder to the mix.
Why Homemade Granola Beats Store-Bought
Store-bought granola can be a sugar bomb in disguise, not to mention overpriced. When you make your own, you control:
- The sugar content (goodbye, sugar overload!)
- The quality of ingredients (organic or local, if you prefer)
- The taste (customize it to your liking).
It’s also a great exercise for the entire family. Kids can mix the ingredients or pick their favorite add-ins.
How to Store Your Granola
Keep your granola fresh with these tips:
- Use an airtight container to prevent moisture from sneaking in.
- Store at room temperature for up to two weeks.
- For long-term storage, freeze your granola in a sealed container for up to 3 months.
FAQs About Homemade Granola
1. Can I substitute quick oats with rolled oats?
It’s not recommended. Quick oats are too fine and don’t give the same hearty texture. Stick with old-fashioned rolled oats for the best results.
2. How do I make my granola less sweet?
Simply reduce the amount of honey or maple syrup. You can also add unsweetened ingredients like raw nuts or seeds.
3. Can I make it gluten-free?
Absolutely! Just ensure you’re using certified gluten-free oats.
4. Can I skip the oil?
You could, but the oil helps give granola its signature crunch. Consider reducing it rather than omitting it completely.
5. How do I prevent my granola from burning?
Bake at a low temperature (around 325°F) and stir halfway through to avoid uneven cooking.
Wrapping It Up
And there you have it—a simple, foolproof way to make homemade granola! Not only will you save money, but you’ll also get to enjoy a healthier and tastier breakfast or snack. Plus, once you’ve mastered the basics, the sky’s the limit with customization. So, grab those oats, preheat your oven, and start making your own delicious granola today.
If you’ve got any favorite granola add-ins or tips, share them in the comments below—I’d love to hear from you!

